Showing posts with label Butterfly Basics. Show all posts

Friday, December 4, 2015

Trying Something New For Scrapbooking - Part 3

This will be the third and final posting for this particular album. See part one, and part two. I had a lot of fun creating this album and look forward to modifying my idea further in future ones. Tomorrow I will be showing you the other album I created as a Christmas gift left behind in Phoenix.


In this next photo you will see that I placed photos on top of a larger one, making it kind of look like photo inserts. My daughter had taken photos of smaller things such as birds and flowers, and since you don't want photo after photo about these things, by printing a wallet sized photo I was able to punch these and position them on a much larger photo where there is just background. Remember you don't have to scrapbook every single photo of your trip. Only those that tell the story. By doing this you add some interest.


By creating a flap like this one, you can add more photos. I love using wallet sized photos! Less cost and takes up less space.


I love this photo of my youngest daughter saying her farewells to Hawaii. And, it makes a great last page.


Be sure to play around with the sizes of your photos, and cut them in sections if need be. It looks great spread out that way, as you've seen in some of the ones I've done in part one of this series.


Hope you enjoyed viewing this album and some of my ideas. See you tomorrow for the 8 x 8 album.

Happy Stamping!


Built for Free Using: My Stampin Blog


Find out which 2015 Holiday Catalogue items will soon be gone! You have until January 4th to purchase RETIRING products while supplies last!

Here is the link to the Holiday Retiring List.


Wednesday, June 17, 2015

More "Moments Like These" Project Life Layouts

I quickly put together more layouts using the new Project Life "Moments like These" Bundle. A couple are traditional on 12 x 12, and the rest are pocket scrapbooking. Using the kit, things come together pretty quickly if you don't do too much stamping and embellishing. Since I like embellishing and didn't much at all this time, I might go back to do that at another time.

This one is a traditional 12 x 12 on black.


As is this one.


This one is a double page pocket layout. I like taking a larger photo and cutting it up to fit in multiple pockets. 


At the next crop I go to, I will complete these with a little more embellishment. 

I must say that Project Life is a great time save for either style of scrapbooking!

Built for Free Using: My Stampin Blog


Have fun with your Project Life Bundle!


Earn Free Stamps in June’s Join Promotion! 


June 2nd also kicks off a new promotion for customers to become demonstrators!  As a demonstrator on my team, you can learn more about Stampin’ Up! promotions and products in our chats and our team meetings.  AND you’ll be the first to see and order products from upcoming catalogs.  On top of all that, you’ll earn a discount on the products you already love – with no risk after you join! AND NOW Hosts can use their Stampin' Rewards to pay for their Starter Kit!


Now for the LIMITED SPECIAL OFFER FROM ME!


Between June 16th and June 30th, everyone that purchases a GIFT BAG PUNCH BOARD (135862) will receive a free set of instructions showing how to make creative projects using this tool. You can make more than gift bags, as per instructions that come with the board. There are boxes, and policy envelopes, and more, that can be designed using this board!!


PLEASE USE THE HOSTESS CODE
If your order is $200+, then I want you to use all the Hostess Rewards you’ve earned.  If your order is under that, I’d be more than happy if you add 
3RTTHPQS as the Hostess Code when you order.  When shopping online, enter your items into your cart (total must be under $200). At check out, look under "Special Offers" (bottom left) enter the Hostess Code in the box and click on apply.


Friday, June 12, 2015

Butterfly Basics in Tip Top Taupe & Silver

Do you remember this card? I loved how the silver looked on the new Tip Top Taupe, that I wanted to try the colour combination again with a different stamp set.

Lots of silver heat embossing! Do you see how I used the Tip Top Taupe Stampin' Write Marker to fill in more colour on the flower stamp I cut out and popped up?

 Lets have a look from the sides so you can see the layering.


When it came to the inside, I used Encore Silver Metallic Ink rather than silver heat embossing or using the Tip Top Taupe ink pad.


I'm thinking that I should have used the Tip Top Taupe.

Hope that you enjoyed seeing this stamp set done in heat embossing for a different way to use it.

Happy Stamping!


Built for Free Using: My Stampin Blog


Earn Free Stamps in June’s Join Promotion!  June 2nd also kicks off a new promotion for customers to become demonstrators!  As a demonstrator on my team, you can learn more about Stampin’ Up! promotions and products in our chats and our team meetings.  AND you’ll be the first to see and order products from upcoming catalogs.  On top of all that, you’ll earn a discount on the products you already love – with no risk after you join! AND NOW Hosts can use their Stampin' Rewards to pay for their Starter Kit!


Monday, May 11, 2015

Another Team Meeting Post

Today I have one more thing to show you that I made for our Team Meeting on Saturday. I decided to surprise everyone with a card... a Hello (just because) kind of card, and write a little something inside. I'm using one of my favorite stamps sets again, Butterfly Basics, but giving it a completely different look.


So, what do you think? Nice and bold and bright, right. Here's a look at just a single card.


Whoever started the double butterfly thing, was very clever, because it looks so good!


For the inside I decided to stamp all those dots over the entire writing area. I plan to use a Stampin' Up Project Life Journaling Pen right over all the dots. It looks great! I've done it before.


So, again we come to the end of this post. Thank you for stopping by to have a look. And, as always, you can view the product I used, below.

Happy stamping!


Built for Free Using: My Stampin Blog


Don't forget the Retirement List!! There's only one month left (till June 2) before these items will no longer be available!! Order online, or get in touch with me.

USE THE HOSTESS CODE
If your order is $200+, then I want you to use all the Hostess Rewards you’ve earned.  If your order is under that, I’d be more than happy if you add  RASSC6C3 as the Hostess Code when you order.  When shopping online, enter your items into your cart (total must be under $200). At check out, look under "Special Offers" (bottom left) enter the Hostess Code in the box and click on apply.


Friday, April 17, 2015

Sending Sympathy & Prayers

A very dear friend of mine passed away on Monday. I will truly miss her sweet spirit, beautiful smile, and kind thoughtfulness. She always spoke of her hubby, which told me how much she loved him. And now he is left alone.

I'm grateful that I have the hobby I do, because I was able to sort through my feelings as I worked on a Sympathy card for her hubby, and calm my emotions. I look forward to building my my stamp collection because you will probably be tired of seeing the sets used so often. But I know that you are patient as I have only started with Stampin'Up just this last October.

So here is the card.


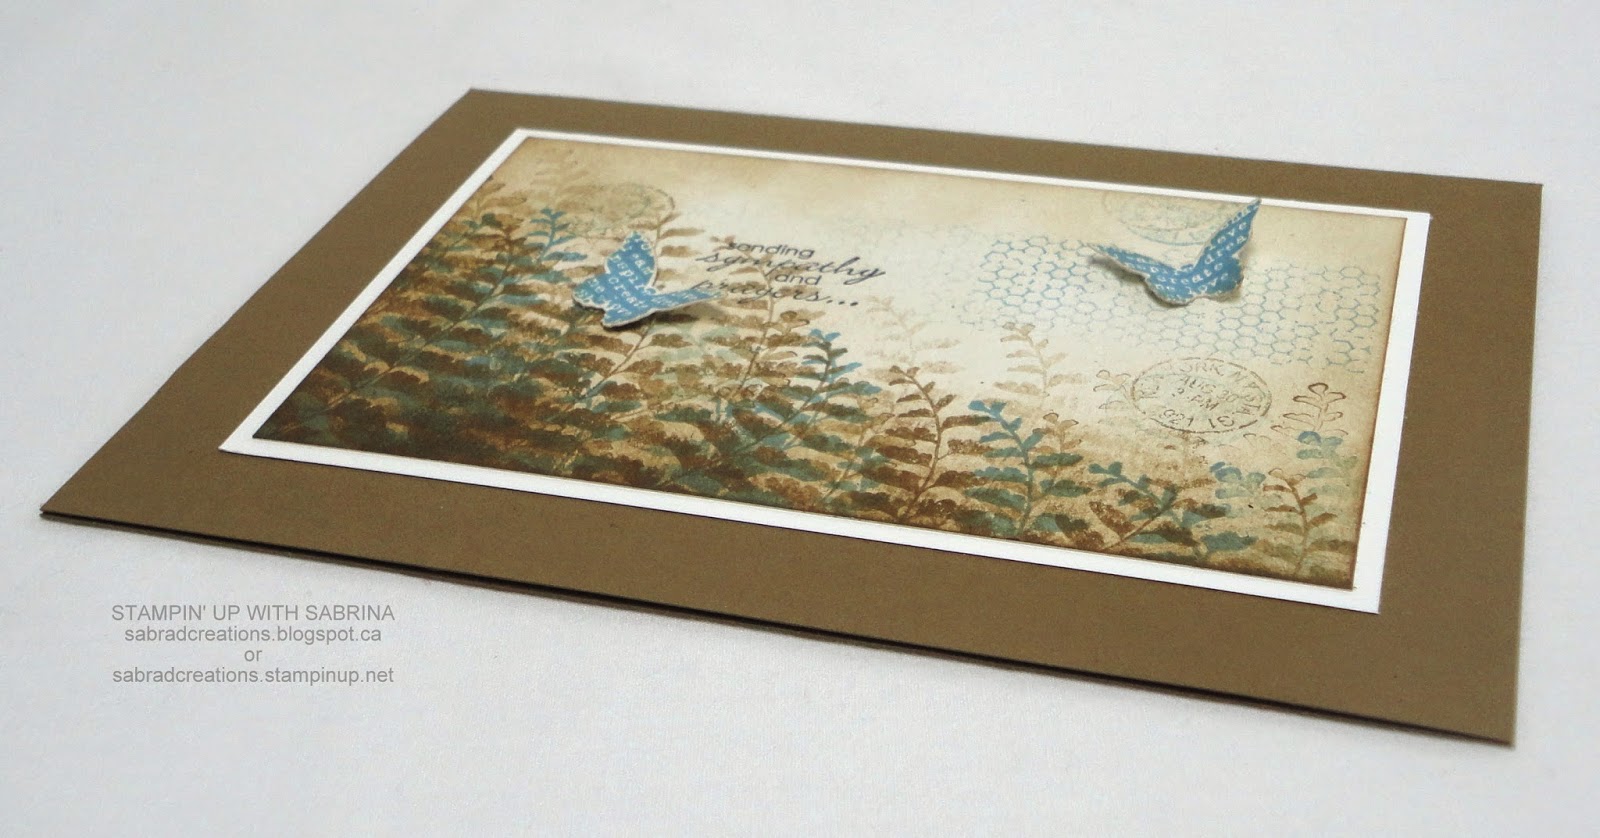
I was experimenting with colour on this one, choosing Soft Suede and Marina Mist ink colours. I'm very pleased at how it turned out. As I'm writing this however, I wonder if I'm as cleaver as I think with this colour combo since something is vaguely familiar about the colours.

Here is a side view...


...and an inside view of the card.


Unfortunately the inside sentiment is crooked because it fell off my block as I was about to lay it down on the paper. (the image is blurry too) What I used to make this card can be viewed below.

I hope that my friend's hubby will feel my heartfelt sympathy when he receives this card.

Thank you for stopping by and letting me share this with you.


ONE MORE WEEK REMAINING to register and pay for one of the Stamp of the Month Card Classes!

http://www.stampinup.net/esuite/home/sabradcreations/events?month=5&year=2015


Built for Free Using: My Stampin Blog


Wednesday, April 15, 2015

More Butterfly Basics!


Hi everyone!

If you're wondering "More?", I did mention that I love this stamp set. This one is very feminine and could be that Mother's Day card I promised a couple of posts ago. (I used it as birthday card)

You will have to excuse the black marks at the top of the card. After completing the card my Stazon ink pad fell off the shelf above and the lid came off onto the card leaving behind these marks. Due to not having enough of the cardstock left to remake the stamped part of the card, I had to show it to you like this.

I think the Soft Sky and the Wisteria Wonder look beautiful together, don't you? It's better in real life. Check it out yourself at home.

As I usually do, the next photos will show you the side view so you can better see the popped up layering, and then the inside of the card which I stamped as well.

When I get more of the cardstock that I need, I can then remake this card. I can't give it away with those black marks on there, can I?


Thank you for joining me for the last few days with these skinny long cards and the Butterfly Basics stamp set. Hope you are inspired to try making more long & skinny cards, and to try combining colours that you never thought would work together. I also encourage you to experiment with your stamps and see what creative ideas you can come with.

To see what I've used to make this card, you can view it below.

Happy Stamping!


Built for Free Using: My Stampin Blog


Monday, April 13, 2015

Butterfly Basics For A Masculine Card?

In my last post I said that I might make a Mother's Day card with the "Butterfly Basics" stamp set. Well, I decided to make a masculine card with the same set first, because an idea popped into my head that I just has to execute.


Who would have thought that I'd use black to stamp foliage? But I think this looks great with the Sahara Sand on this card. Next is a view to show that the only popped up part of this card is the Artisan Label punched sentiment from another stamp set.


And then we have the inside of the card.


I love this stamp set, and know that it will be well used! To see what I all used to make this card, check below. Are you inspired yet?

Here is a colouring video put out by Stampin' Up! Some great fun with some of those Sale-A-Bration items you purchased!


Remember, tomorrow the Weekly Deals change!

Happy Stamping!


Built for Free Using: My Stampin Blog