Showing posts with label Album. Show all posts

Thursday, October 13, 2016

Travel/Trip Planner - By the Shore DSP


Hello everyone!

I recently had a class at Scrapbook Essentials BC, where we created a Christmas planner. I always mention different uses for a planner besides for Christmas. And when I mentioned a Travel or Trip planner, I knew I had to make one using the "By The Shore" DSP and share with my Stampin' Up Customers and friends. Because this planner is for planning a trip, I had to use a retired stamp set. My apologies if you want to order it.

There are a lot of photos showing this planner, so I will not have something to write with each photo, just to keep the post from getting too long.


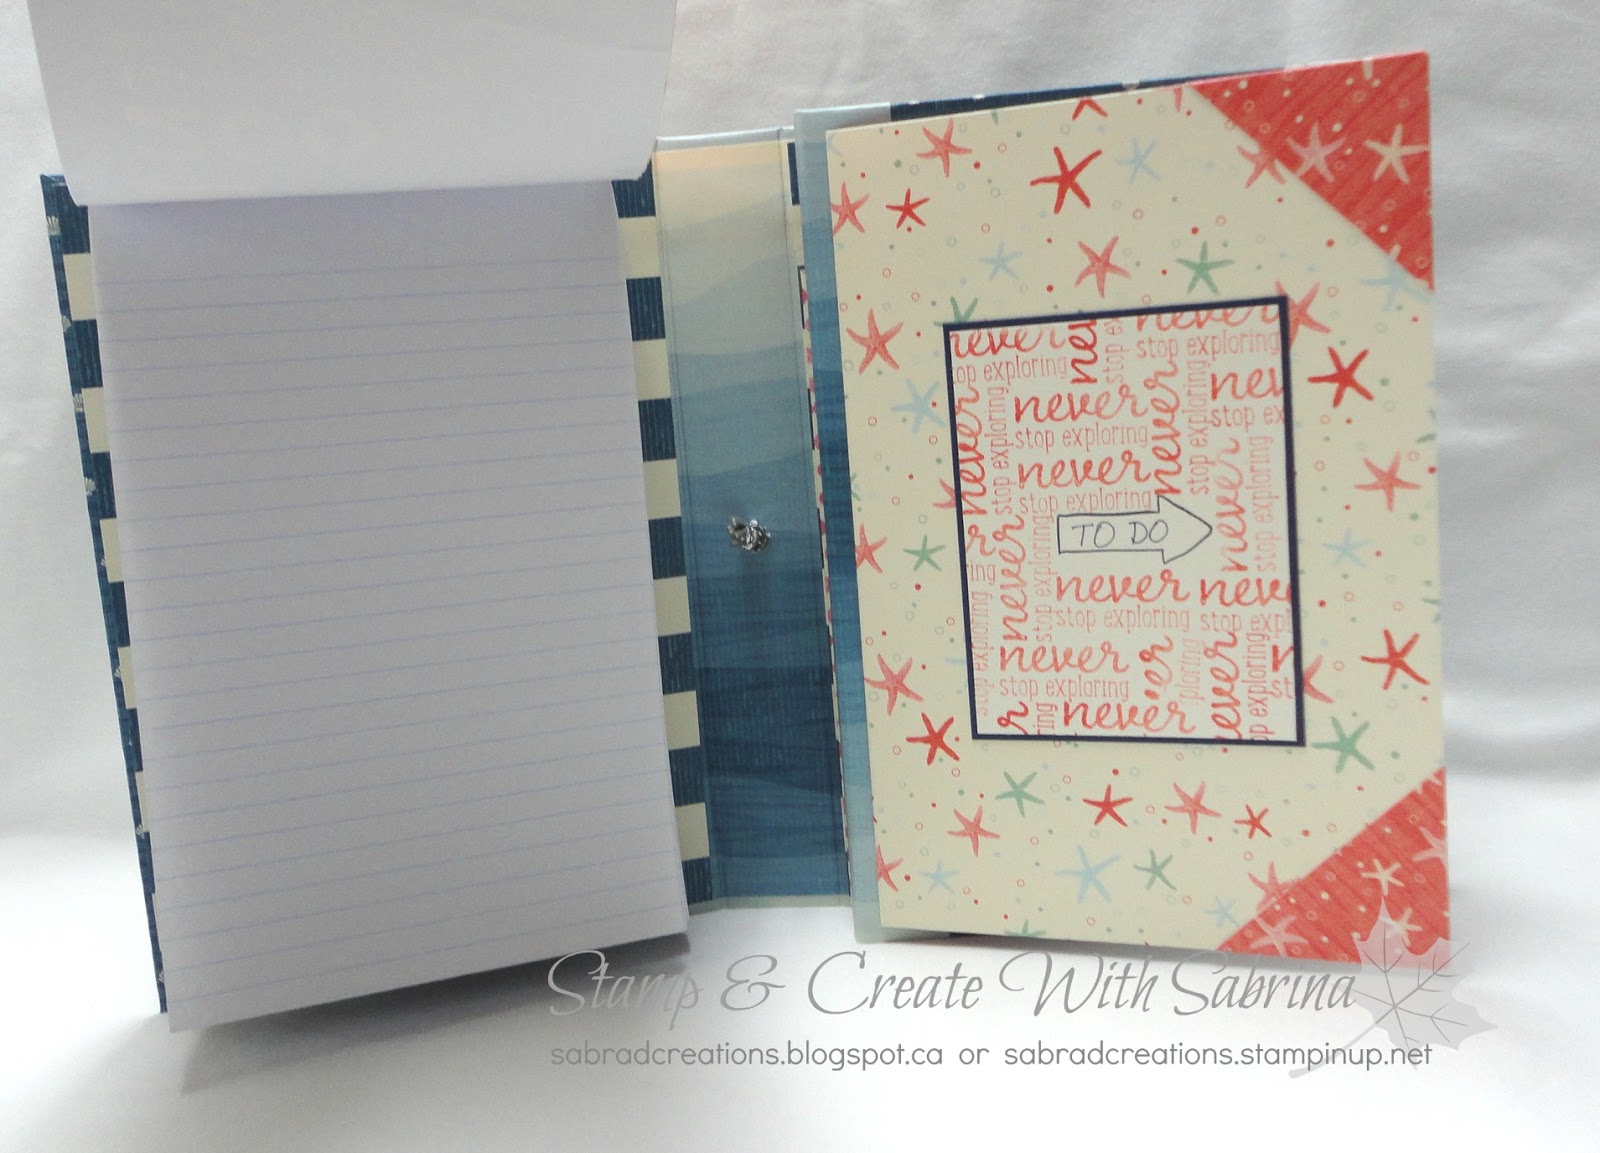
When first opened, you find a note pad on the left, and a page flap on the right.


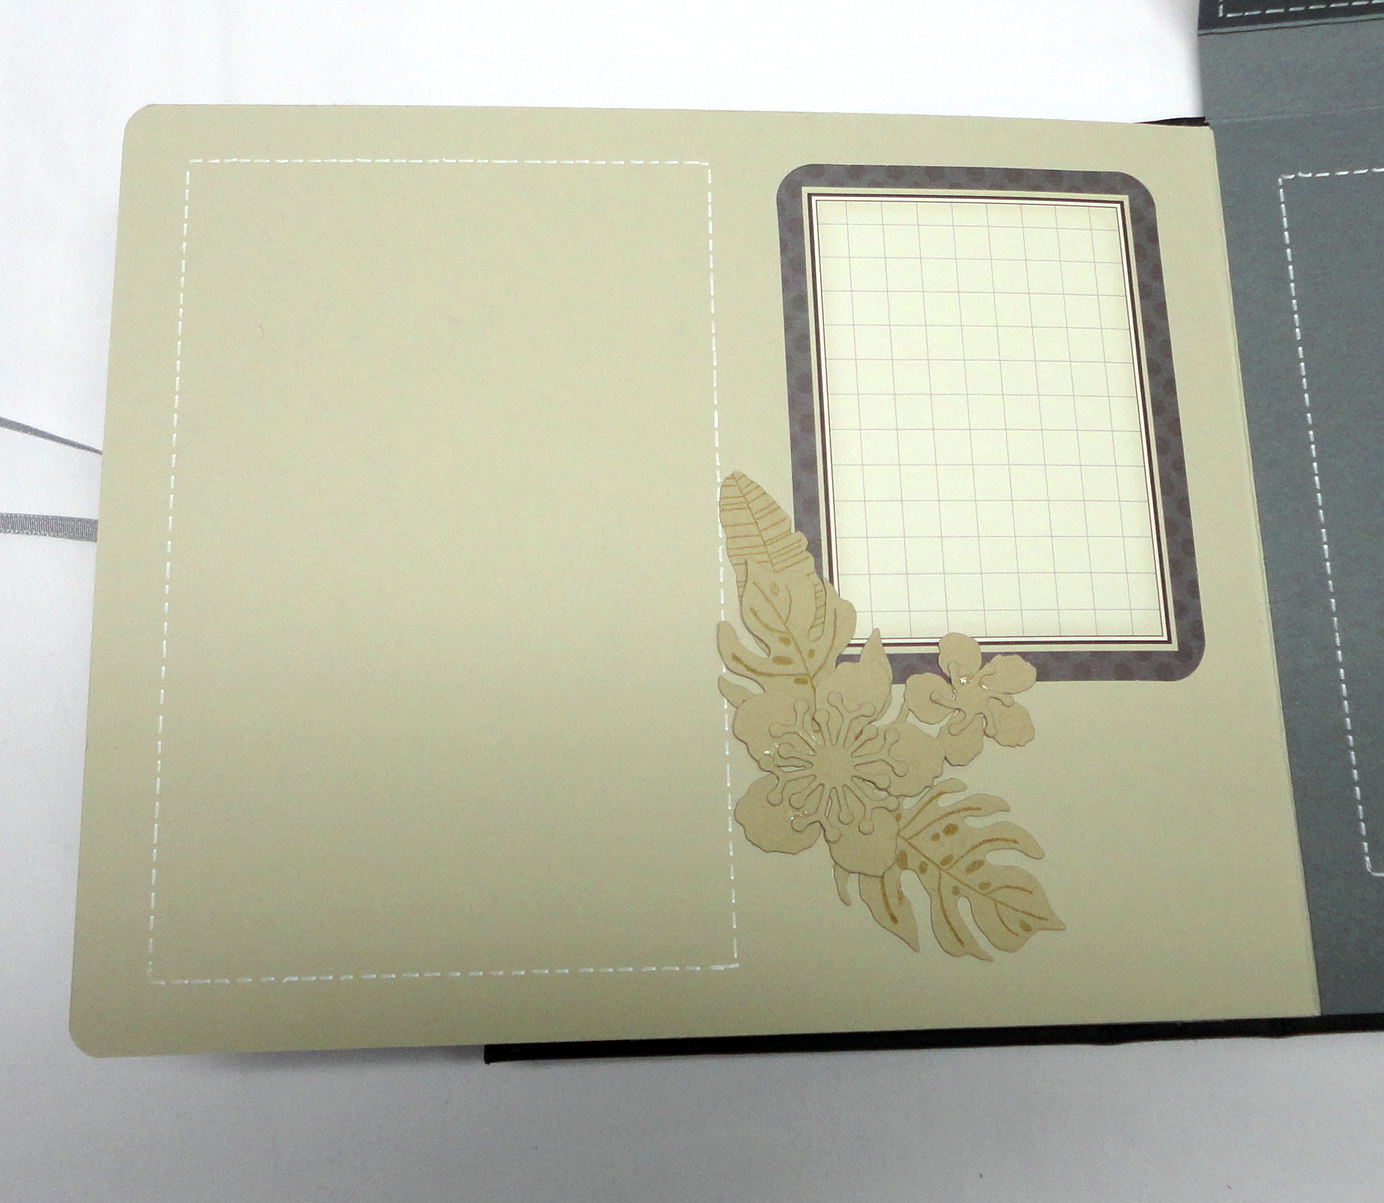
The page flap opened. This is where I would place a trip planning check list.


Flip the next section to the right to reveal pockets containing tags and folders.


Close up for the 3 x 4 card I created with the retired Project Life "Let's Get Away" stamp set.


Another 3 x 4 card where I stamped in the center, and using a Stampin' Write Marker, hand wrote my background text.


You see the folder taken out of their pockets, here. I would attach in side one a planned itinerary, and in another a list of places you want to visit.


On the tags pulled below, I would attach on one side a calendar that you can write on (day, week, or month depending how long your trip is), and on the other side a "To Do" List for planning what is on the calendar side.


When you fold open the last panel of the planner, it will look like this, revealing a receipt & ticket stub envelope.


Close up of the stamped 3 x 4 card.


Close up of the 'receipt & ticket stub' envelope.

Close up of the 3 x 4 card.


Envelope flap opened.


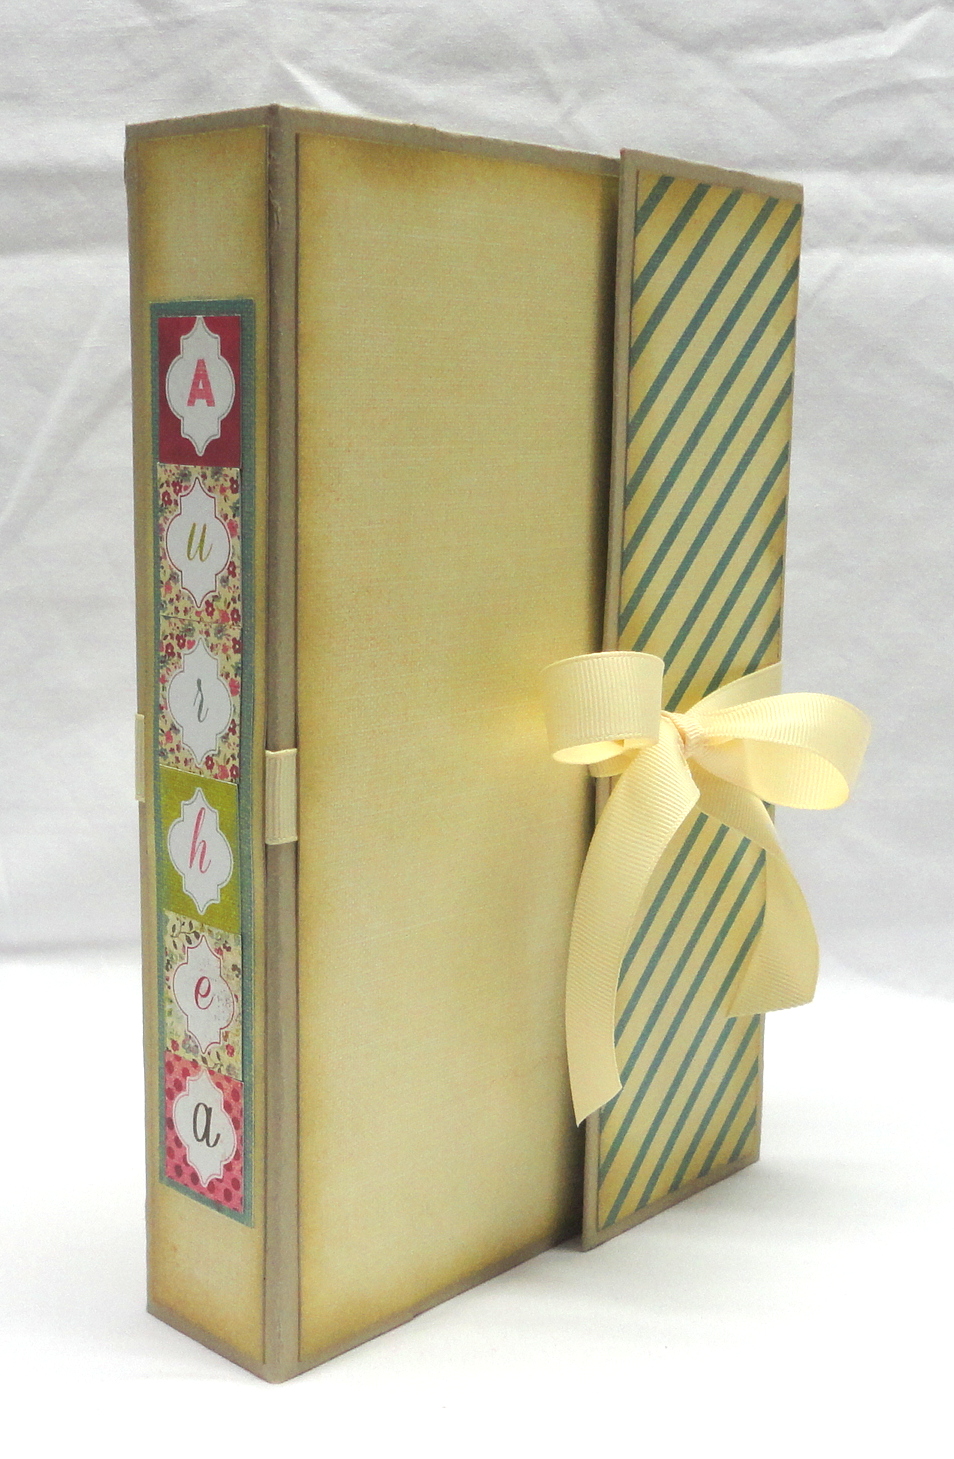
The planner all closed up again.


You know that I created this for a Christmas planner, and adapted it here as a Travel or Trip planner, but you can also adapt it as a Wedding planner, a Family Reunion planner, and so on. You could also use this as a photo folio rather than a planner!

If you are wondering about the planner pages to print and attach on the pages, folders & tags, just search fro free printable planners for Christmas, Wedding, Travel, Trip, Family Reunion, etc. Or, you can create your own! You will need pages for the smaller planner, not the full sized 8 1/2 x 11.

If you are interested in making your own version of this, I do have the instructions for sale. Because the file is rather large, I can not send it as an attachment in an email and can only send you a link to the PDF instructions to download and save, through Adobe PDF Services. So that is what you get when you order the instructions to this project, just a link.


Instruction Options
If you have any questions, I'd be happy to answer them. Just email me.


Thank you for stopping by today, and hope you are inspired to create some lovely Christmas gifts like this project.


Happy creating!


October 1 through 31 , you can buy three packages of Designer Series Paper and get one free! That’s great news since everyone can use more Designer Series Paper. This sale includes Designer Series Paper from both the annual catalog and the recently released holiday catalog (not including Specialty Designer Series Paper or Designer Series Paper Stacks).

Take advantage of these specials for all those Christmas projects you are planning to work on, or gift some lovely supplies to family or friends that love to craft and create!


Sunday, May 15, 2016

Sneak Peek at a Pocket Accordion Folio


Today is the day I will return back home. It will take me a day to unpack and unwind from the trip. But I will be able to answer emails, and take orders again sometime on Monday. In the meantime I am giving you a sneak peak of a small pocket-like accordion folio that will fit in your purse or be easily passed around in a group to view. I hope to have a class, or sell the instructions on how to make it. It will depend on you, my customers, to let me know which you would prefer. SO be sure to comment below, email me, or message me your preference.

Remember this is only a sneak peek so you won't be getting the inside details just yet. Plus the DSP used for this project in a class setting, will be different, using DSP from the new June Catalogue.


The magnetic flap closure is at the top and the pages inside go which way, you think?


If you like folios and mini albums, let me know your option preference - class or instructions - and watch for it this Summer!

Happy creating!


Monday, March 7, 2016

Binder Album - Schoolhouse - Page 6 & 7


Continuing on with the Schoolhouse DSP Album pages, we are looking at pages 6 & 7 today.

First off, the 'life is good' flap, if you look closely you will see that it is embossed with the "Elegant Dots" folder giving a tactile texture to this page layout. the other panels & flaps you see have a faux stitch around the edge. On these you may place your photos, or if you wish, add embellishing elements.


Upon opening the magnetic flap there is a place for a photo to cover the magnet, a little journaling spot, and another magnet to cover with another photo.


That gray flap opens and is spaced for a larger photo that would need to be cut in half to fit within the folded space. When doing this, you must leave close to 1/8" space so that the flap can close and lay properly.


When we have a look at page 7, and open the flap on the right, there are three photo mats for 3 x 4 or wallet sized photos. On the inside of the flap overhanging mat, I took the smallest Clear Block (A), inked it, and stamped a pattern.


Here you see it close up.


To see pages 1 through 3, click here; pages 4 & 5, click here.
Hope you are getting some ideas for creating your album layouts. Thank you for stopping by to have a look.

Oh, and a reminder. Today is the last day to take advantage of the Weekly Deals! That's a great price for the Ornate Tag Topper Punch! New Weekly Deals coming tomorrow.

Happy creating!


Sunday, March 6, 2016

Binder Album - Schoolhouse - Page 4 & 5


Last Wednesday, I showed you pages 1, 2 & 3 of this album. Today you'll see pages 4 & 5. You'll remember that I mentioned using the "Schoolhouse" DSP.

If you take a close look on the right page, on the tab that has "sweet moments" stamped on it, you can barely see the circles that are stamped in the background. I'm bringing your attention to it now, because you won't see it again.

Let's talk about the left page now, and the flaps that you see. The circle is attached in a way that photos can be tucked under it if wished, or left as is.


When you lift the flaps you can add more photos on the inside with a large portrait one in the center. Notice that the stamped "L" is in the correct position for reading when the flap is opened, upside down from the one on the front. It also has a magnet in between the circle layers.

With the right page flap open, there is a nice stamped card made for journaling.


In between the left and right flap, another flap can be opened for more photos. The photo that is on the base, is larger than the ones that are on the two sides of the flap. This will be quite effective when the photos are on it. This larger one will have a strip cur off to position on the other side of the fold on the right flap.


Close up of the journaling flap.


If you have any questions about these two pages, email me and I'll answer them as best as I can for you.

Some of the stamps used are current, and others are retired.

Happy Scrapbooking!


Sunday, February 21, 2016

Commissioned Album - Non Stampin' Up!

Today I am sharing with you another album. This one was commissioned. The only Stampin' Up product used was some cardstock, envelopes, ink, and stamps for this project. The DSP is something I've had for a few years before becoming a Demonstrator. I decided to show it to you anyway, as it may give you some inspiration.

I have a friend that called me up one morning wondering if I would help her. She and her husband had arranged to take their teenage daughter to a spa retreat for a couple of days, and wanted something for her to record the experience, and more life experiences, as well as include a pocket for letters from them both. I had 2 1/2 days to complete the project. My friend had mentioned this album (click here), and so I based this one on it, modifying the size.


As you can see by the photo, I decided not to attach the journaling and embellishment, but have them ready for her to attach herself as she puts her album together. Therefore all the cards, tags and punched shapes.


A ribbon closure done in a little different way. I wanted it to look like it was only tied around the cover flap, but I guess you can see the ribbon under the paper at the folds of the cover...


When opened, this is what you see.


The left holds and accordion of Stampin' Up dotted translucent bags, each with a tabbed tag in it created using the envelope punch board.


I am not going to show you each and every page of this album; just way too many of them. I did however, create outlines using either photo or journaling card templates, to give the daughter an idea of where to position them all as she assembles her album. I also added an envelope pocket here and there throughout the album as you see in the next photo. I glued the envelope shut, trimmed 1/16" off of on one side, on the front envelope side punched an oval thumb pull, and attached it to the page.


Here you can see the accordion pages created.


And lastly, and larger envelope pocket created to hold a letter from each of her parents.


Here the pocket is open.


And as usual, whenever I am creating with paper, I enjoyed doing it all. Hope there is something here to inspire your next album or scrapbooking project.

I used the thin chipboard backing of the 12 x 12 DSP packages for the album cover, covering it with Crumb Cake cardstock; about 1 1/2 packages of 12 x 12 DSP; and about 4 sheets of 8 1/2" x 11" cardstock to make up journaling cards that weren't a part of the DSP; and 1 package of Sketched Dots Tag a Bag Gift Bags (who came up with that name?) 138316.

Be sure to check in tomorrow for a great surprise! Till next time, happy creating!


Saturday, February 20, 2016

Gate Fold Flip Album - All In Neutrals

I've been working on several albums of late, and am enjoying the projects. The one I'm showing you today was a bit of an experiment using only neutral colours in Basic Gray, Sarah Sand, Crumb Cake, Very Vanilla, and a black cover using a non-Stampin' Up! product called Kraft-Tex. Its a paper/fabric which doesn't tear or crack with use, as cardstock can. That's why I used this product. I did learn a few things in using this product, and will have to adjust thow I use it for an album cover or spine.

Any way, let's get to having a look at the album, shall we. As you can see I left the cover plain with no embellishment, just the ribbon closure.

When the album is opened, this is what you see.


You will notice the 'Botanical Builder' dies were used in the album. Everything was cut from Crumb Cake. I love how it looks! Who'd have thought that it would look great in Crumb Cake of all things! But then it is a fabulous die set.


When you lift the top flap you see this. Oh, I should mention that I used another couple non-Stampin' Up! products through out the album, some older Project Life (pre-Stampin' Up!) cards because they coordinated with the colours of the album. Some of these I cut down or punched. The others are some chipboard laser cuts that I had purchased a few years ago form the store where I used to teach classes at.

The square on the upper right corner I created with several different Stampin' Up! Project Life stamp sets.


Close up - see the subtle Versamark text stamping...


Close up of the stamped square (sorry it's not real clear).


Another gate fold section to the album.


When you open that up, there is a place on the left for a larger phtoto (left), a place for a 4 x 4 photo to slide into a frame, and a booklet that opens up when you untie the twine.


Close up


Close up


When you open this booklet you can either journal inside or place additional photos.


Back to the center, when you open up the larger booklet, there are pages with sections for journaling, and places to make up a mini layout of photos, or use one very large page sized photo.


Turn the page...


Turn the page again...


Then when you flip the page that the book is attached to, you find this. There's a place for a 5 x 7 photo. Oh, I guess I should have mentioned that all these Botanical Builder parts are attached so that the photo can slide in behind them, have a part of the floral arrangement over the corners of the photos.


Then when you flip that last flap in the album, there is room for another 5 x 7 or and arrangement of smaller photos within the designated areas.


Close up for detail.


Last close up.


I wish the photos showed more what the album really looks like, because it looks much better in real life. I hope that you enjoyed seeing this any way, and are inspired for the next album or scrapbook page you create.

 All these albums I'm currently making will all be for sale at future classes, crops, and markets. 

If you are interested in buying this album before I get it out in the public, don't hesitate to contact me (sabradcreations@gmail.com).


Should you are interested in knowing more about Kraft-Tex, here is a video I found. It's great stuff with many applications and uses.


Thank you for stopping by today, and happy creating!


Sale-A-Bration! Remember that for every $60 you spend on products from the brand-new Occasions catalogue or Annual Catalogue, you can choose a FREE exclusive Sale-A-Bration product!


PAPER PUMPKIN SALE!

What could possibly make Sale-A-Bration even better? Getting Paper Pumpkin involved of course! Stampin' Up!'s three month PAPER PUMPKIN SALE! January 5th through March 31. A great deal with a surprise kit at your door every month!

3-Month Prepaid Subscription (137859) $$74.85 $69
Save on a 3-month prepaid subscription and instantly qualify for a FREE Sale-A-Bration item!
12-Month Prepaid Subscription (137861) $275.40
Take it to the next level with a 12-month prepaid subscription. Save $24 a year with the everyday awesome price, earn Stampin' Rewards, and instantly qualify for 4 FREE Sale-A-Bration items!

There have been some pretty fantastic Paper Pumpkin kits over this year. Don't miss out on the fun and your chance to save on a 3-month Paper Pumpkin subscription and get a FREE Sale-A-Bration item until March 31st. Contact me today! (sabradcreations@gmail.com)