Showing posts with label Basic Butterfly. Show all posts

Sunday, October 23, 2016

Blooms & Bliss DSP with Butterfly Basics


There are so many products that inspire creativity, and one of those are my favorite Aqua Painters. Using the well loved Butterfly Basics stamp set, and my Aqua Painters I created this card to share with you today. I love this colour combination! (Wild Wasbai, Dapper Denim,& Mint Macaron in the DSP, with Sweet Sugarplum)


Here is a close up of the Aqua Painted Butterfly Basics tag on the card.


And here is a close up of the Floral Affection embossed strip. (Love these two little embossing folders)


Here in the side view you see that the tag is the only thing popped up with dimensionals, and that makes mailing this card to someone easy.


Inside, I Aqua Painted a portion of the stamp to complete this card. I haven't decided what this card will be for, so I am reserving the inside sentiment stamp for the right stamp when the time comes to use this card.


I have two more cards coming using the same sheet of DSP from Blooms & Bliss, so be sure to check in to have a peek. Until then, happy stamping everyone!


I forgot to add the Dapper Denim ink pad with the other colours.


October 1 through 31 , you can buy three packages of Designer Series Paper and get one free! That’s great news since everyone can use more Designer Series Paper. This sale includes Designer Series Paper from both the annual catalog and the recently released holiday catalog (not including Specialty Designer Series Paper or Designer Series Paper Stacks).

Take advantage of these specials for all those Christmas projects you are planning to work on, or gift some lovely supplies to family or friends that love to craft and create!


Tuesday, May 31, 2016

Water Colouring & Water Colour Stamping Using an Old Favorite - Butterfly Basics

Whoops, I thought I scheduled this post for yesterday.


Hello everyone! Looks like today is going to be an absolutely beautiful day again. I've been thinking for a while now that I should make multiples of my Thank You cards since I use so many. I was in the mood for water colouring and thought that might be too much for mass production, but went with the idea anyway. I was also feeling that I wanted to use a stamp set I haven't used in a while, my Butterfly Basics. I'm glad that it is still available in the new catalogue. So here are the dozen cards I made.


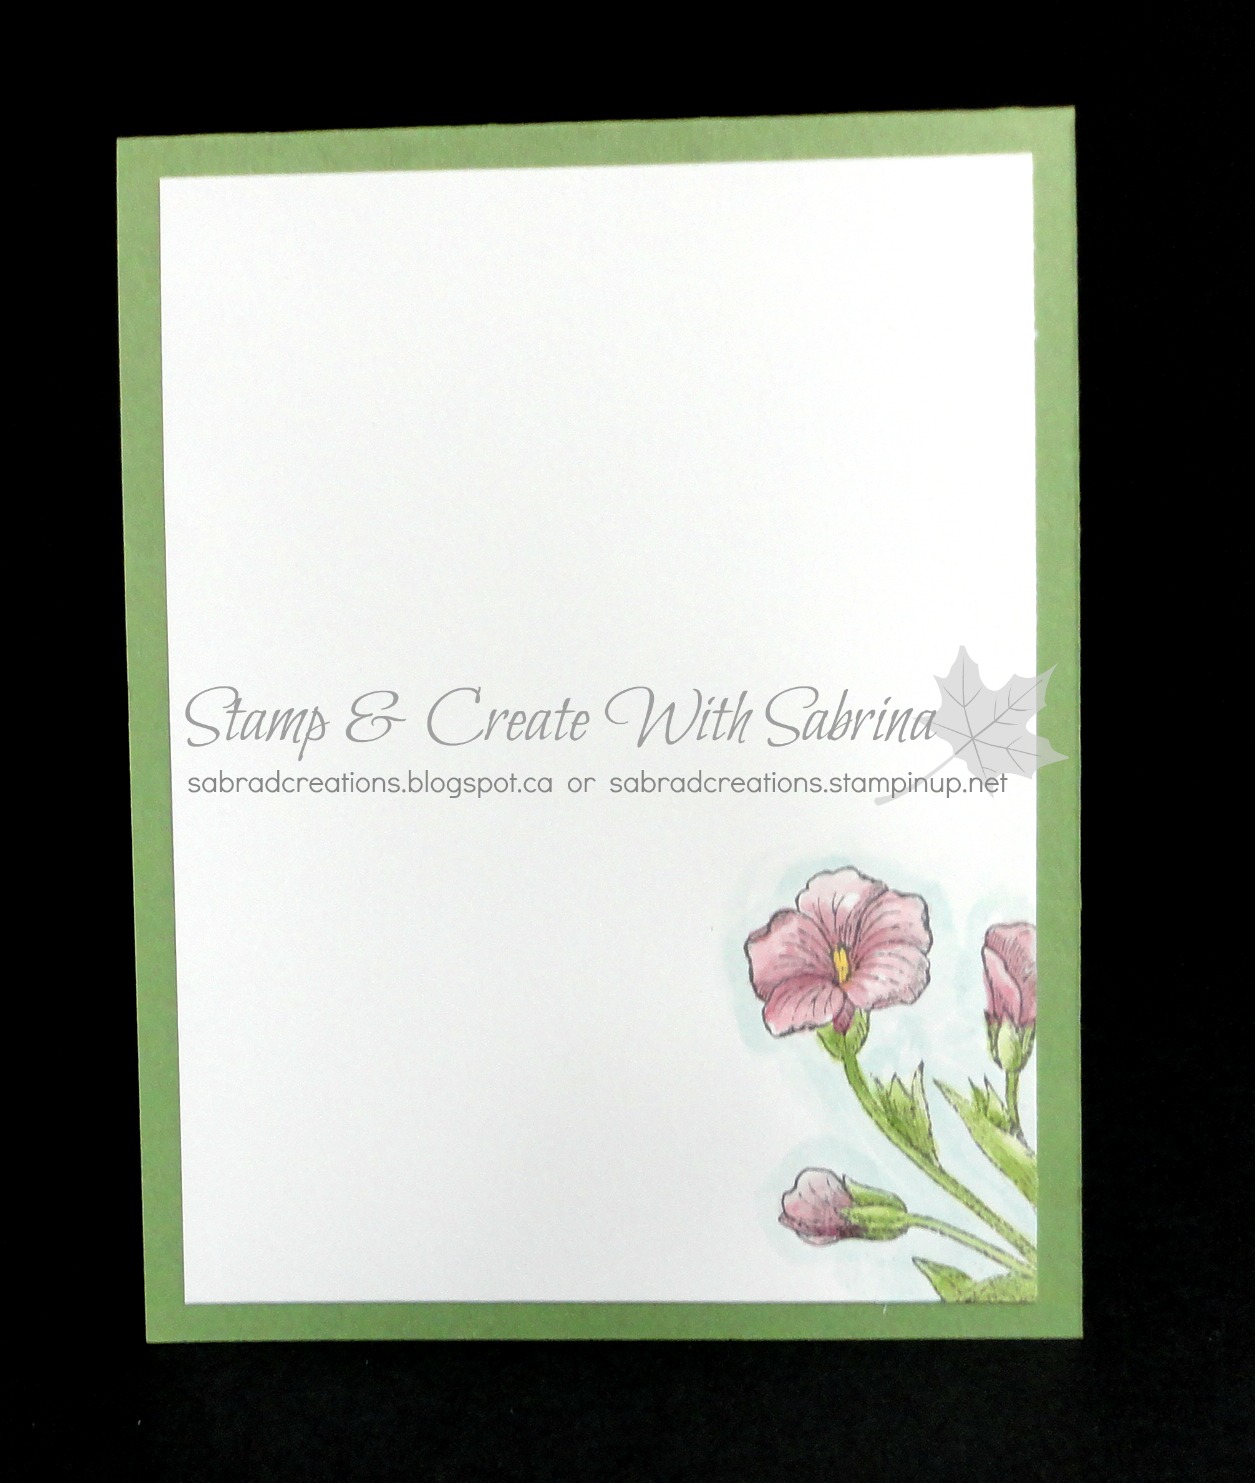
I love how the frame turned out. I used my paper trimmer to create them and stamped the sentiment from the new "Thoughtful Banners" stamp set in Tip Top Taupe. And rather than work with all the dimensionals for the frames, I used the new Foam Adhesive Strips that are available in the new catalogue. It raises the frame up higher than I would like, but it was so much easier to use.


For the water colour background I used Water Colour Paper, my Aqua Painters and Peekaboo Peach, Blushing Bride, and Tip Top Taupe using a lot of water to get that very light airy look. To stamp the water colour image, I used the same colours in the Stampin' Write Markers on a clear block, lightly misted with water, inked my stamp image on that, and then stamped on the water colour background.


I did the same for the butterflies and when dry punch them out and wrapped Linen Thread around the body of the butterfly before attaching it to the card.


You can see the layering in this next photo.


I love how these turned out, and want so very much to try this in another set of colours. Maybe another  time. Hope you are inspired to give this technique a shot. It is quite fun to do.

Happy stamping!


Extra Stampin’ Rewards!

For the month of June, you can get $40 in Extra Stampin' Rewards when you host a stamping event with $400 or more in sales. That’s more money you can use for products in the new annual catalog, and you know there are PLENTY of new products you’ll want to bring home. Remember, Stampin’ Rewards can be used on a Starter Kit, so this is a great time for you to sign up with me!


 Details
  • Hosts who have qualifying events with $400 CAD or more in sales during the promotion period (June 1 - 30) will receive $40 CAD in Extra Stampin’ Rewards for the order.
  • Hosts may participate in this promotion multiple times by hosting multiple events, but each event must qualify on its own.
  • Customer, workshop, and online orders qualify for this promotion.
  • Qualifying orders must qualify with merchandise prior to shipping and tax.


Wednesday, December 2, 2015

Trying Something New For Scrapbooking

Hello everyone! I'm back from visiting family in Phoenix and had an absolutely  wonderful time.

Today, and over the next few days, I will be focusing on scrapbooking. I created a couple of scrapbooks for my eldest son's family and for my youngest daughter. These are Christmas gifts that I brought with me and they opened on US Thanksgiving day. I wanted to see their reactions rather than have them wait for Christmas when I wouldn't be there.

I have been searching for the last year or so for a better way to scrapbook. The 12 x 12 format I am finding too large for my liking these days. Besides I was getting too elaborate with these pages and they were so thick that I couldn't get many pages into the 12 x 12 albums. The scrapbooks end up so heavy as well. I went to pocket scrapbooking (Project Life) and while I like that, it just wasn't me. So I looked into 8 x 8 scrapbooking.


When I first signed up with Stampin' Up! just over a year ago, I was able to purchase two retired 2013 Christmas albums. One I created using the pocket scrapbooking sleeves and of which was unable to get photos of before leaving. I had to combine the pocket pages from two into one, plus purchase additional sleeves elsewhere, which left one album without page sleeves.

I also Purchased two Stampin' Up! Project Life Kraft Albums (139655), which I love! I also love Mini-Albums, but the one disadvantage is the time it takes to create the album cover, and you can't add pages to it.

I finally came up with an idea that might work better for me. So over the next few days I will be showing you what I have done, and perhaps this is something you would like as well. 


Let's begin with the pages I created for the Stampin' Up! Project Life Kraft Albums (139655).

Each page consists of using an entire 8 1/2 x 11 sheet of cardstock trimmed down slightly.
  1. Trim cardstock down to 8 1/4" x 11.
  2.  I then punched two holes (at 2" & 6 1/4").
  3. If you want the flap on the right (front), flip to the back side with holes on right, 11" across top, and score at 4 1/4". If you want the flap on the left (or back) place with holes on the left, 11" across top, and score at 6 3/4". 
  4. Take your choice of 12 x 12 DSP (designer series paper) and cut off 6" keeping in mind your paper pattern.
  5. Cut that same piece with 12'' across, at 8". This gives you two pieces. (one at 4 x 8, and one at 4 x 4)
  6. With the remainder piece (8 x 12) cut with 12" across at 6". This gives you two pieces at 6" x 8".
This is what your pages will look like.


Now let me show you what I did with my youngest daughter's photos from her trip to Hawaii with her dad January 2015. As there are several pages, I will be showing them to you over the next few days. Let's begin with the first few.


For the title page I chose a beautiful photo my daughter took of one of the beaches. This one happens to have been used in the movie "100 First Dates". I like to have an 1/8" white border around my photos which adds a pop to them whether I mat them or not.

I used a "Window Sheet" cut down to 6 3/4" x 8 1/4" and the "Layered Letters Alphabet" (138692) and Project Life "Day to Day" (135785), for the year numbers, with White StazOn Ink (106960).


I decided to use my Stampin' Up! Stamping Sponges (101610) to add colour to each of the page edges. 


On the left I create a space where my daughter could write a basic itinerary of the day to day activities while there. That writing space is created with two Project Life "Grid Cards" (136528) and a few different Project life stamp sets.

As this is the first page, with the a flap, I didn't put photos on it but rather decorated it with a number of stamps on a "Note Tag Punch" and a narrow strip.

Let's open that flap, shall we...


It was great fun using all those stamp sets in the scrapbooking style! I highly recommend the use of your stamps! Here are some of the rest of the pages. (Remember, I will be showing you more another day.) You will have excuse some of the photos as some are not clear. I had to take the photos very quickly, just hours before leaving, and didn't realize that the settings had somehow changed on my camera. And since I'm uploading and posting after having given the albums away, I can't retake the photos.


Well, I hope you enjoyed the album so far and are looking forward to more pages to be shared with you.

Thank you for stopping by to have a look, and Happy Stamping! See you soon with More!


Here is what I used throughout the entire album (except for the colours of ink pads and coloured cardstock used. You will be choosing your own colours.


Built for Free Using: My Stampin Blog


Find out which 2015 Holiday Catalogue items will soon be gone! You have until January 4th to purchase RETIRING products while supplies last!

Here is the link to the Holiday Retiring List.