Squeezing this post in amongst the posting of projects for classes. As most of you know, I belong to a Stampin' Up group here in the area called 'Seashore Stampers'. We try to get together every month, and usually do. This year I am finding my schedule of Saturdays, to be filled more with other things, like classes, and won't make as many of them as I'd like. Today's meeting I was originally unable to attend, however the class I had scheduled for today was cancelled a few days ago, and even though I had a cold, I was hoping to be well enough to go to the meeting. Yeah!!!!
Anyway, one of the things we are doing each month, is if anyone in our group has a birthday that month, we each make a papercrafting gift to the birthday girl or girls. For January, Erica has just recently celebrated her birthday, so this is the gift that I made for her.
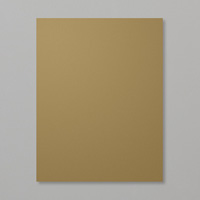
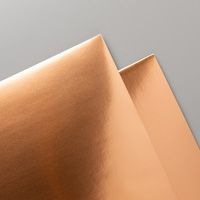
I wanted to use Copper Foil for the project, but found that I was out! So in my search for a substitute, I found an unopened package of retired Champagne Glimmer Paper! I love that colour and was sad when it was discontinued. I know that Erica likes a bit of glitter, you just have to look at her phone cover to know that, (lol)
If you are wondering I how I used one stamp, with very closely spaced lettering, to get some words heat embossed and the rest stamped... well, I used my Stamp-a-ma-jig, and my Soft Suede Stampin' Write marker for the small text. Then I used the Stampin' Buddy over the area and used a VersaMarker Watermark pen (not Stampin' Up) to colour the two words I wanted to heat emboss (using the Stamp-a-ma-jig to line it up). Then you can go ahead and heat emboss!
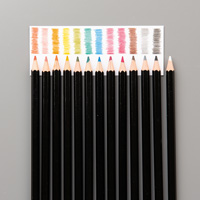
Of course I used the new Stampin' Up Watercolour Pencils and Blender to colour in the woman.
I decided that I needed to make a stand for the frame so that it could be displayed where ever Erica wanted to place it. So I had to come up with a way to make that. (Details are further below)
So there you have the project. Since I have a cold, a video on how to make this is out of the question, so you will have to make due, again, with photos and written instructions.
When this frame is completed it measures 6 x 6 x 3/4 without the stand. With the stand it measures 6 x 6 x 3. The working space inside the frame is 4 1/2 x 4 1/2.
FRAME
To start you will need a 12 x 12 piece of cardstock for the frame.
- On your score board you will score @ 3/4. 1 1/2, 2 1/4, 3, 9, 9 3/4, 10 1/2, & 11 1/4.
- Turn you paper and score @ 3/4. 1 1/2, 2 1/4, 3, 9, 9 3/4, 10 1/2, & 11 1/4.
- Now on two opposite sides you will score @ 3 3/4 & 8 1/4 JUST DOWN TO THE SECOND SCORE LINE
- Next you will cut all four corners as you see here. (I left one corner uncut so that you could see what it looks like. The remaining corner will be cut just like the one to the right.)
- It will look like this when all cut.
- Add your adhesive tape (glue sometimes make the paper buckle too much) on the right side of your paper as indicated in the photo above.
- On the wrong side there will be adhesive required in the four little triangles as shown in the photo above.
- You will also need to attach your background DSP BEFORE folding the frame. It will measure 5 7/8 x 5 7/8.
- Start with the two straight cut sides. You see one done above.
- Do the same on the opposite side as seen above.
- Now tuck the other end under as you did on the other two sides, but be sure to have the corners lined up before press the adhesive down in the corners.
When done your frame should like this one.
FRAME STAND
- You will begin with a coordinating piece of cardstock the same colour as your frame measuring 5 3/4 x 5 3/4
- Score @ 2 1/4 & 3 1/4. this gives you a 1" space to attach to the frame
- With a ruler, at the top, measure 3/8" on each side of the score line and make a mark
- At the bottom, measure 3/4" from the bottom two corners up
- For my spacer cut, I used the largest of the 'Lots of Labels' Framelits (138281) because the top curve is exactly 1" wide. Line it up on the edge of the platform so that it only die cut down the straight sides about 1 1/4".
- On your paper trimmer, or score board,score from the die cut edge to the scored line, on either side.
- Now you will cut from mark to mark on your paper trimmer, and fold all your score lines
- Place your adhesive tape as indicated in the photo above. You see that adhesive is not placed on the center section of the spacer, just on the ends.
- When assembled it should like the above photo (only neater as I just stuck the tiniest piece of adhesive on those two flaps)
- You will than attach this on the center back of your frame with the bottom of the stand lining up with the bottom of your frame, as seen below.
Now you are ready to create what you will on the front inside of your frame! Hope this all helps you create your own lovely frame projects. Just think...Mother's Day, Father's Day, Birthdays, Easter, Christmas, Congrats, Encouragement, etc! A lot can be done with these!
Adding these photos after giving the gift today. I had forgotten to take photos of the gift bag made by piecing scraps together and the coordinating Birthday card.
I had to ask Erica to take photos of her card and gift bag...
Hope you enjoyed this post, and happy creating!