Showing posts with label Boxes. Show all posts

Saturday, January 28, 2017

Sharing a Double Gift Made That Gave Me Another Idea!


Today I would like to share with you a gift a made for two lovely young women, that are serving a mission here in Victoria, BC. Actually it is two gifts, as they each received one. They are identical on the outside, but the inside holds most everything different from each other.

As a Stampin' Up Demonstrator, and instructor at Scrapbook Essentials, BC, I end up with a ton of cards! Some I sell and many I give away as sets for gifts. I was expecting these two young ladies over at my place and thought that as missionaries they could always use cards! Especially 'Thank You' cards, and I have a lot of those. I chose 18 cards each, and then thought I had to give them the cards in a nice box, and not just tied up with ribbon in a bag.

So next was what kind of box, and what would make it a box that they could keep and use over and over again? It had to look good on a desk or on a shelf somewhere. It had to be eye catching but simple. It had to be neat and clean looking. If it where to be used over and over again, what would the box need to make access to the cards easy without creating stress on the opening of the box? Then I remembered this box. I only had to modify the idea to meet the requirements for this box.

So out came my sketchbook, and I drew my new idea and figured out the measurements needed. To make it sturdy to last longer, I had to add additional cardstock panels on the inside and bottom to give it more strength. So I figured those out too.

And this is the result!


As I assembled them, I began to think that these would look lovely on my shelves, too! A place to keep my cards all in the same box, labeled with the type of card in the box - birthday, thank you, sympathy, thinking of you, and so on. If I made them all the same colour or combination of colours, my shelves would look a lot neater, without seeing cards stacked in clear bins. 


 The amazing thing about these boxes, is that the front folds down, and the panels that lay flat when opened, could also have a card list for the year added to them. This way you could have one box with all the cards you need for the year! Then when the year is over, just go to the other card boxes to pull out the cards needed for the next year! So one box would act as a card organizer for the year, while the others would be easily accessible card storage.

So here, in the next photo, you can see that you could access the cards from the top, but...


 ...if you pull down the front flap, you can get them even easier. You can see that the 18 cards with envelopes in this box, do not take up all the space, And, some of those cards are thick. If the cards are fairly flat, you could probably get 24 cards with envelopes in there easily.


Now, I know some you will want to make these for yourself or in a class. Please be patient and I will get the instructions out there for you as soon as I can. In the mean time, keep creating those lovely cards to fill up some of these boxes with!

Happy creating!


Wednesday, December 21, 2016

Dream Theme Internationsl Blog Hop - HAPPY NEW YEAR!


Welcome from Renate's blog.  With the end of the year not far behind Christmas, we are taking the time to share with you some New Year inspiration.
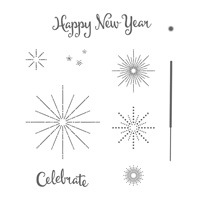
The 2016 Holiday Catalogue does carry some New Year related stamp sets, and my shared project uses the "It's a Celebration" stamp set. I don't usually make New Year cards, but I had a blast creating it. I noticed that black, gold & silver seem to be the colour choice for New Years; why not, as there are some formal parties with tux and gown where the New Year is greeted at midnight.

I'm sharing with you an A7 card (7"w x 5"h) and a coordinating 'Curvy Keepsake' treat box.


Here is the card with the heat embossed gold & silver sparkler, or fireworks if you wish, as the background.


The gold foil numbers are raised with dimensionals, and the vellum heat embossed banner is attached to the numbers.


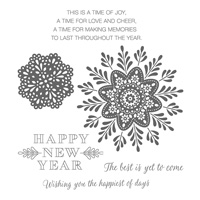
Some more gold heat embossing on the inside with a sentiment (from Frosted Medallions.


The little "Curvy Keepsake Box" look great with the gold & silver heat embossing and gold ribbon and vellum tag.


If you are planning a New Years party, perhaps this project has inspired you in preparing for it. Be sure to check out the Team's creations on their blogs for more inspiration and fun.


https://schnipseldesign.com/2016/12/21/dream-theme-blog-hop-silvester/

http://zokris.blogspot.ca/2016/12/happy-new-year.html


Patrice Halliday-Larsen (New Zealand)
Tracy May (UK)
Delphine Lorelli (France)
Amy Koenders (USA)
Renate Ecklmayr (Austria)
Sabrina Radeck (Canada)...that's me...
Krista Driessen (Netherlands)


Hope you all have a wonderful Christmas, and a Happy New Year! And see you again on January 21, 2017!

Happy creating!


Year-End Closeouts!


Wednesday, November 16, 2016

Dream Theme Blog Hop - Small GIfts


Welcome from Renate Ecklmayr's blog in our Dream Theme International Blog Hop! Hope you are enjoying all the wonderful creations made so far.


As you probably know by now, today's theme is "small gifts". I decided to see if I could make a masculine small gift box. I went to find some small gift giving items one might give to a man (or older teenager) and found a small foam shaving canister, and a small masculine shampoo. I was thinking of a third item, but couldn't find one without running to several stores. So I left it at that.

Ever since I made my Pretty Pines Christmas card in Early Espresso and copper, I have loved the colour combination. So I thought this gift box would be the perfect opportunity to use it again.  The gift box measures 5 1/4"w x 3 1/2" d x1 7/8"h.


Behind the circle closure, or I should between the layers, is a magnet to help secure the box lid in position.


Here, in this next photo, you see the contents, with an empty little section. That section is for little treats, I just didn't have any on hand when taking the photos.


With everything out of the box, below, you can see the division of the box. If this would be a feminine version, you might want to place the largest oval die cut in silver, as a faux mirror, into the lid of the box. You can kind of see a bit of a gap in the front center where the lip of the box is; that is where the other magnet is placed.


When the items are used or placed somewhere else, this box would look lovely on any dresser, night stand, or even in the living room, to hold other items such as a watch,  money clip & cuff-links, or just some treats.

Now it's time check out what the talented Jennifer Pauli has created for your inspiration!

https://schnipseldesign.com/2016/11/16/dream-theme-blog-hop-kleine-geschenke


http://wp.me/p1mTlb-2Zo


Check out any of these creatively talented ladies blogs!


Teneale Williams (Australia)
Patrice Halliday-Larsen (New Zealand)
Tracy May (UK)
Delphine Lorelli (France)
Amy Koenders (USA)
Renate Ecklmayr (Austria)
Sabrina Radeck (Canada)...that's me...
Jennifer Pauli (Germany)


Happy stamping & creating!


http://www.stampinup.net/esuite/home/sabradcreations/promotions

From November 1st through 30th, you have the opportunity to purchase Stitched Shapes Framelits ahead of their official release in the 2017-2018 annual catalog and get 25% off coordinating stamp sets. With Stitched Shapes Framelits you can make paper stitches in seconds, turning any project into one that is stitched from the heart.