Showing posts with label Wetlands. Show all posts

Sunday, November 6, 2016

Get Well Package - Thinking of You


I made this a while ago, in the hopes of getting my second on completed to show them together. The second one is a Christmas Gift Package, but I didn't quite get it done in time, so I'm just showing you this one.

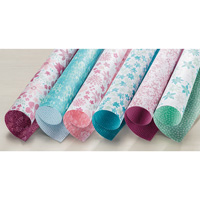
This is the time of year when people begin to get sniffles, colds, and coughs, so I thought it might be fun to create a Get Well Package using the Stampin' Up! Wide Half Stamp Container (page 183 in the Annual Catalogue). The lovely patterns and colours of the Blooms & Bliss DSP are being used on this one.


Upon opening this package/container, you see
  • a small Dollar Store pen
  • a covered mini-composition note book with a whole year mini-calendar attached to the front
  • Halls cough drops covered in DSP
  • chapstick/lipbalm
  • and a tissue holder (instructions)

As you can see in the next photo, I attached everything inside using Velcro. I did not have any white, which I would have chosen if I did. A tip for those of you wanting to create your own, don't use as large pieces of Velcro as I did. Some of the items are a little harder to get out (like tissue box).

I also left space over the cough drops so that the pen wouldn't keep the box from closing.


Now I see that I forgot to add something. I had though of attaching a tea bag in a self made envelope attached to the left side of the case so that it would fold over the note book. Maybe I will still do that for the Christmas Gift Case.


Happy gift making!


http://www.stampinup.net/esuite/home/sabradcreations/promotions

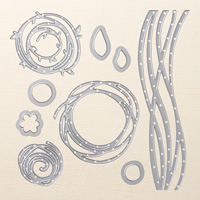
From November 1st through 30th, you have the opportunity to purchase Stitched Shapes Framelits ahead of their official release in the 2017-2018 annual catalog and get 25% off coordinating stamp sets. With Stitched Shapes Framelits you can make paper stitches in seconds, turning any project into one that is stitched from the heart.


Thursday, October 27, 2016

Blooms & BLiss DSP With Swirly Bird & Swirly Scribble THinlits


I always love to arrange flowers. Literally, and on cards. Using the same piece of Blooms & Bliss DSP, combined with Swirly Bird & Swirly Scribbles Thinlits, I was able to do just that.

Sometimes those little tiny stamps can really surprise you with all that you can do with them!


Here is a more close up look at the little swirly bird blossoms arranged on the front of the card.


This side view shows that only a few of the tiny blossoms were popped up with dimensionals.


I then carried the theme of a bunch of tiny blossoms to the inside of the card.


Hope that you have fun making this card, or your version of it. Great bundle to have!

Be sure to drop by tomorrow for a Christmas Card class announcement. They will be pretty easy cards to make. Great for a beginner or for mass producing Christmas cards!


Happy Stamping!


October 1 through 31 , you can buy three packages of Designer Series Paper and get one free! That’s great news since everyone can use more Designer Series Paper for Easy to make Christmas cards or for creating Christmas packaging and gifts. This sale includes Designer Series Paper from both the annual catalog and the recently released holiday catalog (not including Specialty Designer Series Paper or Designer Series Paper Stacks).


Friday, January 15, 2016

"Wild About Flowers" Thinking of You


As I mentioned yesterday, today's card is another case. The original was designed by Kim from Stamping at the Warren. I did make a few slight changes to it. The card base is Early Espresso, and I used two different greens for the stems; Old Olive & Pear Pizzazz, and some of the Melon Mambo flowers are second stamped/off stamped.


The sentiment, below, is stamped in Early Espresso and punched out with the Note Tag punch. Linen Thread is looped in behind the tag. with a Gold Metallic button tied off with a bow at the top of the tag.


This was so much fun to stamp! I think I would like to try it with the watercolour technique on Watercolour paper.

Next, you see the side view showing the two layers that are popped up with dimensionals.


For the inside I just did a couple of corners in like manner of the front.


This turned out to be a bright and cheerful looking card. I wonder what it would look like in other colours? Maybe you could give it a try and let me know how it turned out. You could even send me a photo or link to yours in a comment.

Here is what I used to create this card.


Built for Free Using: My Stampin Blog

Well, that's it for the new cards added to others I made for schedule some classes for you. So I guess I had better start posting the class events so that you can sign up/RSVP. Looking forward to seeing you all again after the holidays.

Happy Stamping!


Sale-A-Bration! Remember that for every $60 you spend on products from the brand-new occasions catalogue (or any other current Stampin’ Up! publication), you’ll get a FREE exclusive Sale-A-Bration product.

PAPER PUMPKIN SALE!

What could possibly make Sale-A-Bration even better? Getting Paper Pumpkin involved of course! Stampin' Up!'s three month PAPER PUMPKIN SALE! January 5th through March 31. A great deal with a surprise kit at your door every month!

3-Month Prepaid Subscription (137859) $$74.85 $69
Save on a 3-month prepaid subscription and instantly qualify for a FREE Sale-A-Bration item!
12-Month Prepaid Subscription (137861) $275.40
Take it to the next level with a 12-month prepaid subscription. Save $24 a year with the everyday awesome price, earn Stampin' Rewards, and instantly qualify for 4 FREE Sale-A-Bration items!

There have been some pretty fantastic Paper Pumpkin kits over this year. Don't miss out on the fun and your chance to save on a 3-month Paper Pumpkin subscription and get a FREE Sale-A-Bration item until March 31st. Contact me today! (sabradcreations@gmail.com)


Sunday, December 6, 2015

Trying Something New For Scrapbooking - Part 5

Welcome! Today is the last of the Scrapbooking series. Hope you have been enjoying some of the new ideas I've come up with. I really enjoyed working on these two albums. I used some of the "Neutrals Designer Series Pack Stack" (138435) in this album. I love the new DSP stacks from this year. You can the page on the left below, where I used the Smoky Slate paper. On the right, the large 7 x 5 photo is attached to the narrow flap, so that when you lift it there are more photos revealed behind it. (the grasses you see at the bottom were stamped with the grass from "Wetlands" (126697) in alternating colours.          


 In the photo below, the right page has two bows tied with double "Linen Thread". When you untie these and lift up the tag end (one on the bottom & one at the top), more photos are revealed.  I used the "Layered Letters Alphabet" (138692) on the right, popped up with dimensionals. I'm sure I will be using that technique again.         


The page on the I used the beautiful "Bordering Blooms" set (133660) again, and on the right, below, is an accordion page.  


You can see here how I made a larger photo spread across the fold of the page. I also used scrap strips on the right of the photo. Faux stitching always looks wonderful in albums as well as on cards.


On the inside of the accordion page, the left has the word "Smile" stamped on from a retired stamp set and is a flap that lifts up to reveal more photos. On the right you see the word 'Joy". this was die cut using the"wonderful Wreath Framelits" set.


If you have two very different colours being used from one page to another, I like to try and find a way to connect them. On this occasion I used stars. On the left are stars stamped from a retired stamp set, and on the right I used the "Star Framelits" (133723). I took a sheet of regular paper and die cut stars from it to use as a stencil and stamped text into the star shape.


Below, on the left, you see overlapping tabs created with the Envelope Punch Board (133774) with a heart stamped with "Groovy Love" (134246) and punched out with the "Sweetheart Punch" (133786). Behind the heart is a magnet to help keep the overlapping tab closed. And it looks like I didn't get a photo of them opened. Wonder how I missed that? I guess I was in a hurry...

On the right I used the "Chevron Border Punch" (132154) on a strip from the "Sweet Li'l Things DSP" (138447) and used some of the punched out bits on the cardstock flap pointing to the month stamped on using "Project Life Day to Day" (135785). The letters are from the same alphabet stamp mentioned earlier, and are the initials of the two in the hidden photo.


You might be wondering why I stopped at the month of August. Well I didn't. I just was unable to get photos of the rest before leaving for Phoenix. I did complete it up through November except for the US Thanksgiving celebrations. And, since December hadn't happened yet, that too is missing from the album. My plan is to complete those pages and send them off later.

So there you have some different scrapbooking ideas that combine scrapbooking and mini-album techniques. Thanks for joining me in viewing this series.

Happy creating & stamping!


Built for Free Using: My Stampin Blog


Find out which 2015 Holiday Catalogue items will soon be gone! You have until January 4th to purchase RETIRING products while supplies last!

Here is the link to the Holiday Retiring List.