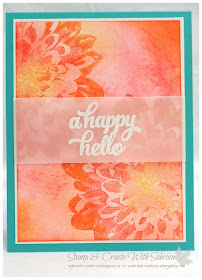
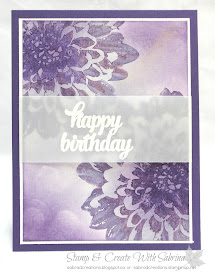
All the heat embossed sentiments on vellum are from the "Tin of Cards" stamp set.
I used three colours for each card with the exception of this first card, I used four.
Stampin' Write Markers for the stamp - Blushing Bride, Calypso Coral, & Tangelo Twist
Ink Sponging - Crushed Curry, Blushing Bride, Calypso Coral & Tangelo Twist
I wanted a bright tropical look and chose to contrast the colours with a Tempting Turquoise card base.
Stampin' Write Markers for the stamp - Delightful Dijon, Crushed Curry, & So Saffron
Ink Sponging - Blushing Bride (just a touch), Crushed Curry, & So Saffron
I had a hard time choosing the card base for this card because so many colours looked wonderful with these yellows. In the end I went with the black for a more dramatic look.
Stampin' Write Markers for the stamp - Cherry Cobbler, Rose Red, & Watermelon Wonder,
Ink Sponging - Delightful Dijon, Crushed Curry, & So Saffron
Who would have thought that these colours would work well together! I chose Melon Mambo for the card base, which is not a colour used in the colours of this card, but seemed pull all the colours together.
Stampin' Write Markers for the stamp - Marina Mist, Night of Navy, & Mint Macaron
Ink Sponging - Marina Mist, Night of Navy, & Mint Macaron
I kept going back and forth between a Mint Macaron & Night of Navy card base for this card. My end choice is obvious, but I did include a 1/16" mat behind the white, on the inside, in Night of Navy. For the colouring of these flowers, I applied the colours in a different order than I did for all the other cards. I usually went from lightest to darkest colours stating with the center of the dahlia, or from lightest to darkest. With this card I started in the center with the medium colour, to the darkest, and ending with the lightest on the outside edge of the dahlia.
Stampin' Write Markers for the stamp - Elegant Eggplant, Perfect Plum & Wisteria Wonder
Ink Sponging - Elegant Eggplant, Perfect Plum & Wisteria Wonder
In the upper right section of this card you will see something that looks like a orangey/yellow strip. That's because I didn't notice that this was lying underneath the yellow dahlias when I was sponging the yellows onto the card! I decided to not redo the purple dahlias and ended up liking that strip of yellow. lol!
So, these are the five cards I got done. I was hoping to make a sixth, but ran out of time. I may still do that, and design a new style of box for these cards, showing them to you at a later date. I will also have to think of something else to create with beautiful Dahlia stamp.
Thank you for stopping by today. Hope you are enjoying your weekend!
Happy stamping!
I'm not including the cardstock and ink pads in the product list below, too much info to include and I did already list them with each image.


No comments:
Post a Comment